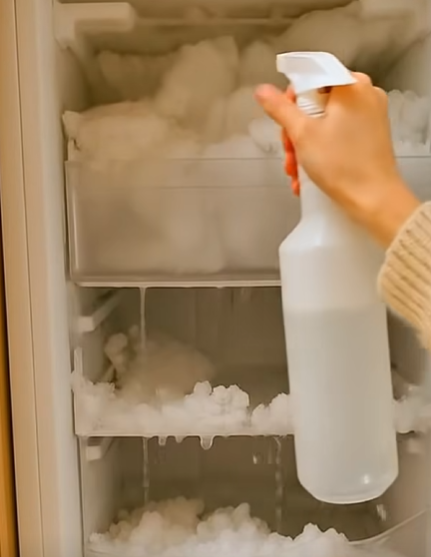
Defrosting a freezer is one of those household chores that many people postpone for as long as possible. It can involve moving frozen food, waiting for stubborn ice to melt, wiping up puddles, and cleaning shelves before everything can be put back in place. What should be a straightforward task can quickly turn into an afternoon of work.
For a long time, I thought there was no easy way around it. Whenever a thick layer of frost developed inside my freezer, I prepared myself for a lengthy process. I would remove the food, place towels around the appliance, and wait for the ice to loosen. Sometimes it seemed to take forever, especially when large chunks had formed around the shelves or near the walls.
Eventually, I learned that the process could be made much more manageable by using a simple approach: switching off and unplugging the freezer, removing the food, and placing a bowl of warm—not boiling—water inside to help loosen the ice.
The method is straightforward, requires very little equipment, and can reduce the amount of time spent waiting for stubborn frost to soften. The exact time depends on how much ice has accumulated and the freezer’s design, so it is not a guaranteed solution that will melt every layer in a few minutes.
Still, with the right preparation, defrosting can become a far less frustrating chore.
Why Does Ice Build Up Inside a Freezer?
Before looking at the method, it helps to understand why freezers develop frost in the first place.
Every time the freezer door opens, warmer air from the room can enter the compartment. That air contains moisture, which may condense and freeze when it encounters the cold interior surfaces.
Over time, repeated exposure to warm, humid air can cause frost to accumulate on the walls, shelves, and around stored items.
Several everyday habits can contribute to the problem.
Leaving the door open for too long gives warm air more time to enter. Placing food inside while it is still warm can introduce additional heat and moisture. A damaged door seal may also allow humid air to enter even when the door appears to be closed.
In some cases, the freezer may simply need maintenance or may have a design that requires occasional manual defrosting.
A thin layer of frost is not unusual in many conventional freezers. However, substantial ice accumulation can reduce usable storage space and make drawers or shelves harder to operate.
It may also interfere with efficient operation, depending on the appliance and the location of the buildup.
Understanding the cause is useful because removing existing ice is only part of the solution. Preventing unnecessary moisture from entering can help slow its return.
The Simple Warm-Water Method
One of the easiest ways to help loosen frost in a freezer is to use a bowl of warm water.
The warmth helps raise the temperature of the air inside the compartment, encouraging the ice to soften and separate from the surfaces. As the ice begins to loosen, it becomes easier to remove without scraping or damaging the appliance.
However, preparation is important.
Step 1: Check the manufacturer’s instructions
Before starting, consult the freezer’s manual for the recommended defrosting procedure.
Some appliances have specific instructions about how to handle water, remove drawers, access drainage channels, or switch off the unit. Following those instructions is particularly important for appliances with built-in ice makers or other specialized features.
If your freezer has an automatic defrost function, check whether manual defrosting is necessary at all.
Step 2: Protect and relocate the food
Remove the food and place it in a suitable insulated cooler or another freezer if one is available.
Keep frozen items together to help them remain cold, and limit the time they spend outside the freezer. Food that has thawed should be handled according to established food-safety guidance; do not refreeze food simply because you want to finish cleaning.
If you have a large amount of food, planning the defrosting for a time when the freezer is relatively empty can make the task easier.
This step may take some organization, but it prevents the cleaning process from creating a separate food-storage problem.
Step 3: Switch off and unplug the appliance
Turn off the freezer and unplug it before beginning the defrosting process, following the manufacturer’s instructions.
This is an important safety precaution. Water and electrical equipment should not be mixed, and the appliance should remain disconnected while you are cleaning its interior.
Make sure the plug and electrical outlet stay dry throughout the process.
Step 4: Protect the floor
Place absorbent towels around the bottom of the freezer to catch melting ice and water.
If your model has a designated defrost drain or drainage tray, use it according to the manual. Avoid blocking vents or drainage openings.
For a particularly frosty freezer, you may need to replace wet towels during the process.
A little preparation can prevent a small amount of melting ice from becoming a large puddle on the kitchen floor.
Step 5: Place a bowl of warm water inside
Put a heat-safe bowl containing warm water on a stable surface inside the freezer.
The water should be warm rather than boiling. Avoid pouring hot water directly onto the freezer walls or placing a container that is too hot on a cold glass shelf.
If necessary, use a folded towel or another manufacturer-approved protective surface beneath the bowl, provided it does not block any drainage channels.
Close the door for a short period if the appliance design and your manufacturer’s instructions permit it. The warm air and steam can help soften the frost.
Check the bowl periodically and replace the water with fresh warm water when it has cooled.
Never leave hot water unattended in an unstable container.
Step 6: Allow the frost to loosen naturally
As the ice begins to soften, you may notice edges separating from the walls or larger pieces becoming easier to remove.
Avoid rushing this stage.
Do not use knives, screwdrivers, chisels, or other sharp tools to chip away at the ice. Freezer walls may conceal refrigerant tubing or other components, and puncturing them can cause serious damage.
Likewise, do not use a hair dryer, heat gun, open flame, or other improvised heating device unless the manufacturer explicitly permits a particular method. These approaches can introduce electrical, fire, or appliance-damage risks.
Patience is usually the safer option.
Step 7: Remove loosened ice and dry the interior
Once the frost has softened, gently remove loose pieces by hand if they come away easily and the manufacturer’s instructions allow it.
Use a soft cloth or sponge to wipe away remaining moisture. Check corners, shelves, and drainage areas for pooled water.
If the appliance manual recommends a particular cleaning solution, follow those directions. Avoid abrasive products or chemicals that could damage interior surfaces.
The freezer should be clean and dry before you restore normal operation.
Step 8: Restart the freezer correctly
Reconnect and restart the appliance according to its instructions.
Allow it to return to the recommended storage temperature before restocking it with frozen food. The time required varies by model and conditions, so consult the manual rather than relying on a universal waiting period.
Once the freezer is sufficiently cold, return the food promptly and organize it so that the door can close properly.
The result should be a cleaner interior with more usable space and fewer obstructions caused by accumulated frost.
Why You Should Never Use a Knife to Remove Ice
When thick frost refuses to budge, it can be tempting to reach for a sharp utensil.
However, this is one shortcut worth avoiding.
The inner walls of a freezer may contain or sit close to components that are essential to its cooling system. A sharp object can damage these parts, potentially causing refrigerant leakage or making the appliance unusable.
Even if the ice looks thick enough to cut safely, it can be difficult to know where the appliance’s internal components are located.
For the same reason, heavy force should not be used to pull away ice that remains firmly attached.
Warm water, time, and gentle removal of already-loosened frost are safer alternatives for many manually defrosted freezers.
If the ice is unusually thick, the manufacturer’s recommended procedure should take priority over any general household tip.
How to Prevent Frost From Returning So Quickly
Once the freezer has been defrosted, a few everyday habits can help reduce future buildup.
Check the door seal
A damaged or dirty gasket may allow warm, moist air to enter.
Inspect the seal for visible tears, gaps, or areas that no longer sit properly against the cabinet. Clean it according to the manufacturer’s guidance.
If the seal is damaged or the door does not close securely, consider arranging a repair.
Avoid leaving the door open
Decide what you need before opening the freezer, and return items promptly.
Keeping the door open while searching through several drawers can allow a substantial amount of humid air to enter.
A simple organization system can make it easier to find food quickly.
Let hot food cool appropriately
Do not put steaming-hot food directly into the freezer.
Follow food-safety guidance for cooling and storage, and avoid leaving perishable food at room temperature for extended periods while waiting for it to cool.
The aim is to handle food safely while avoiding unnecessary heat and moisture entering the freezer.
Keep vents clear
Many freezers require adequate airflow to operate properly.
Avoid packing food in a way that blocks internal vents, and follow the manufacturer’s recommendations for loading and storage.
A well-organized freezer is often easier to use and may make it simpler to notice developing frost problems.
Investigate repeated heavy ice buildup
If thick frost returns unusually quickly, the problem may be more than everyday moisture entering the compartment.
A faulty door seal, a door that is not closing correctly, or a malfunctioning component could be contributing to the issue.
Repeated heavy buildup deserves attention rather than endless defrosting. If basic checks do not identify the cause, consult the manufacturer or a qualified appliance technician.
Is This Method Suitable for Every Freezer?
No single defrosting method is appropriate for every appliance.
Some freezers are designed to defrost automatically and should not require routine manual defrosting under normal conditions. Others require occasional manual attention.
The bowl-of-warm-water approach is a general option for certain manually defrosted freezers, but the manufacturer’s instructions always take precedence.
Appliances with particular shelf materials, drainage systems, ice makers, or other specialized features may require additional precautions.
If you are unsure whether warm water is suitable for your model, check the manual or contact the manufacturer before proceeding.
The amount of frost also matters. A thin layer may soften relatively quickly, while thick, compacted ice can take considerably longer.
It is best to treat the method as a way to simplify the task rather than a promise that every freezer can be defrosted in a few minutes.
Final Thoughts: A Simpler Way to Tackle an Unwanted Household Chore
Defrosting a freezer does not have to become an unnecessarily stressful project.
With a little preparation, the right equipment, and a careful approach, you can make the process easier while reducing the risk of damaging your appliance.
The warm-water method can help loosen frost in many manually defrosted freezers, allowing stubborn ice to soften naturally instead of requiring forceful scraping.
The most important steps are to protect the food, disconnect the appliance safely, collect melting water, avoid sharp tools and improvised heating devices, and follow the manufacturer’s instructions throughout the process.
Once the freezer is clean, simple habits such as checking the door seal, limiting the time the door stays open, and keeping the interior organized can help reduce future frost buildup.
The next time you notice a layer of ice forming, you will have a practical approach to try—and a better understanding of how to carry out the job safely.
Sometimes, the best household solutions are not complicated inventions. They are straightforward techniques that save effort, protect the equipment you already own, and make routine maintenance a little less frustrating.