A Simple Steam-Cleaning Method to Help Freshen Your Oven at Home
Cleaning an oven is one of those household tasks that many people postpone. Over time, grease splatters, baked-on food, and cooking residue can accumulate on the interior surfaces, making the appliance look untidy and sometimes creating unpleasant odors during cooking. What begins as a small spill can become more difficult to remove after repeated exposure to heat.
Commercial oven cleaners are available in many stores, but some people prefer to begin with simpler household cleaning methods. Steam cleaning is one option that can help loosen certain types of food residue and make routine oven maintenance easier.
The basic idea is straightforward: warm moisture helps soften dried-on deposits, allowing them to be wiped away with less scrubbing. Depending on the oven’s design and the type of buildup, this approach may be useful for light to moderate cleaning. It will not necessarily remove every stubborn stain, and heavily soiled ovens may require a product specifically approved for the appliance.
There are several ways to use steam safely, but it is important to follow the oven manufacturer’s instructions. Not every oven is designed for the same cleaning process, and some appliances have dedicated steam-cleaning settings that should be used instead of improvised methods.
This guide explains how steam can help with oven cleaning, which supplies may be useful, how to avoid common mistakes, and how to maintain a cleaner oven between deeper cleaning sessions.
Why Oven Cleaning Can Be Difficult
An oven regularly exposes food residue to high temperatures. Grease from roasting, sauces that bubble over, cheese, sugar, and other ingredients can land on the walls, floor, racks, and door. Once heated repeatedly, these materials may become dry, sticky, or firmly attached to the surfaces.
Different kinds of residue behave differently.
Fresh food spills are often relatively easy to remove after the oven has cooled. Grease that has been heated several times may be more difficult to wipe away. Sugary spills can become particularly stubborn, while carbonized food deposits may require a specialized cleaning method.
The longer residue remains in place, the more challenging routine cleaning may become. Buildup can also produce odors when the oven heats up again, especially if old food particles remain near the heating elements or on the oven floor.
Regular maintenance can prevent many of these problems. Wiping up suitable spills after the appliance has cooled, cleaning removable racks separately, and checking the interior periodically can reduce the need for intensive scrubbing.
Steam can be helpful because moisture softens some residues and makes them easier to remove. However, it should be treated as a cleaning aid rather than a guaranteed solution for every type of oven buildup.
How Steam Helps Loosen Food Residue
Steam cleaning relies on moisture and heat to soften certain deposits.
When water is heated, it produces water vapor. Warm, moist conditions can help loosen dried food residue, particularly when the deposits are not deeply carbonized. After the oven cools, a cloth or nonabrasive sponge can remove some of the softened material.
This method is attractive because it can reduce the amount of physical scrubbing required. It may also be useful for routine maintenance when the oven has light grease marks or small food splashes.
However, steam does not dissolve every substance, and it should not be assumed to sanitize or thoroughly disinfect an oven. The main goal of this approach is to make suitable residue easier to remove.
It is also important to distinguish between a manufacturer-designed steam-cleaning cycle and a homemade steam method. Some ovens are specifically designed to use a small amount of water during a cleaning program. Others are not. Using an improvised method in an appliance that does not support it could lead to damage or unsafe conditions.
Before starting, check the owner’s manual for any instructions about water, steam, cleaning products, and acceptable cookware.
What You May Need
For a basic steam-assisted cleaning session, the following supplies may be useful:
- Clean water.
- An oven-safe container approved for the temperature involved.
- A soft cleaning cloth or nonabrasive sponge.
- A small amount of mild dishwashing liquid, if permitted for the surfaces being cleaned.
- A dry cloth or towel for the final wipe.
- Protective oven mitts for handling warm cookware, when appropriate.
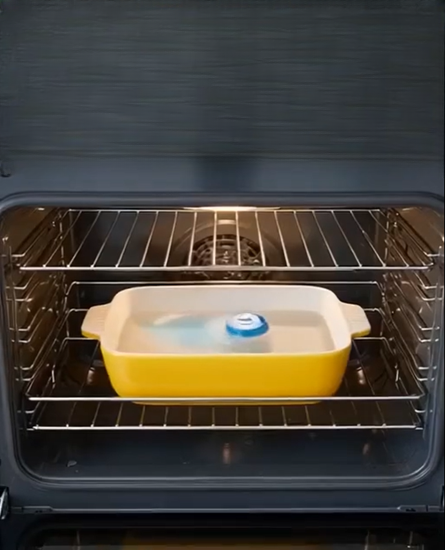
A dishwasher detergent pod is sometimes suggested in household cleaning advice, but it is not automatically suitable for this purpose. Dishwasher detergents are formulated for use in dishwashers, not for heating inside an oven. They may contain ingredients that should not be exposed to direct oven heat, and their use can leave unwanted residue or create other problems.
For that reason, do not place a dishwasher pod in a container of water and heat it in the oven unless the oven manufacturer and the detergent manufacturer explicitly state that this use is safe. In ordinary circumstances, plain water is the simpler choice for steam-assisted cleaning. If additional cleaning power is needed, use a product specifically approved for the oven.
The container itself also matters. It must be designed for oven use and suitable for the temperatures involved. Ordinary plastic bowls, storage containers, and dishes that are not labeled oven-safe should never be placed inside a heated oven.
Step-by-Step: A Cautious Steam-Assisted Cleaning Method
The following approach is intended only for ovens whose manufacturer permits this type of cleaning. If the manual recommends a specific cleaning cycle, follow those instructions instead.
Step 1: Check the oven’s instructions
Before adding water or using any cleaning product, consult the appliance manual.
Some manufacturers provide a dedicated steam-cleaning feature with specific instructions about the quantity of water, the location where it should be added, and the required cycle. Other models may prohibit introducing water into the oven cavity.
If the manual does not permit an improvised steam method, do not proceed with one. Choose a cleaning process recommended for that particular appliance.
Also check whether the oven has a special interior coating that requires a particular type of cleaner or cloth.
Step 2: Make sure the oven is empty
Remove cookware, baking trays, loose food particles, and other items that do not need to remain inside.
If the racks are removable, consult the manual to determine whether they should be taken out during cleaning. Some racks can be cleaned separately, while others have special finishes that require different care.
Do not remove panels, heating elements, or other appliance components unless the manufacturer specifically instructs you to do so.
Step 3: Remove loose debris
Once the oven is completely cool, use a soft cloth or suitable brush to remove loose crumbs and dried food particles.
This simple step prevents loose debris from becoming mixed with moisture during cleaning. It also makes it easier to see which areas contain stubborn deposits.
Avoid scraping the interior with knives, metal tools, or abrasive pads. These can damage protective coatings or scratch the glass and metal surfaces.
Step 4: Use plain water only where permitted
If the manual allows steam-assisted cleaning with an oven-safe container, add the specified amount of water to that container.
Do not fill the container excessively. Water can spill during handling, and a container that is too full may be difficult to move safely.
Place it in the location recommended by the manufacturer. Do not pour water directly onto heating elements, electrical components, vents, or the oven floor unless the appliance’s instructions explicitly require it.
If the oven includes a dedicated steam-cleaning program, use the prescribed method rather than choosing an arbitrary temperature or duration.
Step 5: Follow the approved heating instructions
Use only the temperature, cycle, and duration specified in the appliance manual.
Avoid improvising with high temperatures or prolonged heating. The aim is to use moisture to help loosen residue, not to create excessive steam or expose the appliance to conditions it was not designed to handle.
Keep children and pets away from the appliance while it is operating. Do not leave the process unattended if the manufacturer’s instructions require supervision.
Step 6: Allow the oven to cool
After the approved cycle is complete, turn the oven off and allow it to cool according to the manual.
Never reach into a hot oven to wipe the interior. Steam can cause burns, and the container or nearby surfaces may remain hot even after the heating cycle has ended.
Do not open the door abruptly if doing so could expose you to a concentrated release of hot vapor. Follow the manufacturer’s instructions for opening and cooling the appliance.